Skip to main content
501.225.3333
SCHEDULE A CONSULTATION
Location &
Directions
Menu
501.225.3333
Location
Home
Dr. Prince
About
Our Team
Our Office
Financing
Forms
Concierge Services
News & Blog
Hospital Affiliations
COVID-19 Policies
Breast
Breast Augmentation
Breast Lift
Breast Lift with Implants
Breast Reduction
Breast Implant Revision
Breast Implant Removal
Breast Asymmetries
Gynecomastia
Gender Affirming Top Surgery
Body
Liposuction
Tummy Tuck
Mommy Makeover
Labiaplasty
Arm Lift Surgery
Post Weight Loss Surgery
Thigh Lift
Buttock Lift
Men
BOTOX
®
Cosmetic
Eyelid Surgery
Injectable Dermal Fillers
Liposuction
Tummy Tuck
Gynecomastia
Face
Eyelid Surgery
Non-Surgical
BOTOX
Dermal Fillers
Cheekbone Contouring
Tear Trough Filler (Under Eye Treatment)
Jawline Enhancement
Lip Fillers
Nasolabial Fold Treatments
Non-Surgical Chin Augmentation
SKINVIVE
™
by JUVÉDERM
®
Skin Care Treatments and Products
Laser Resurfacing
Patient Reviews
Contact
Photo Gallery
Gallery
Home
.
Gallery
.
Lower Body Lift
.
Patient 2
Lower Body Lift Gallery
Back to Gallery
Prev
Next
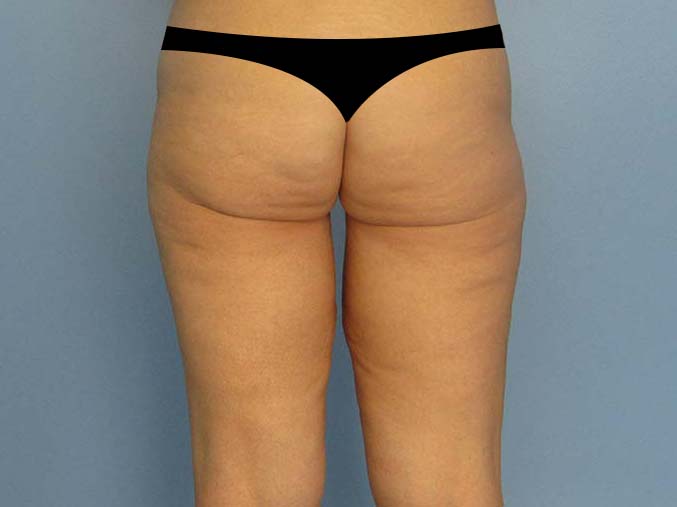
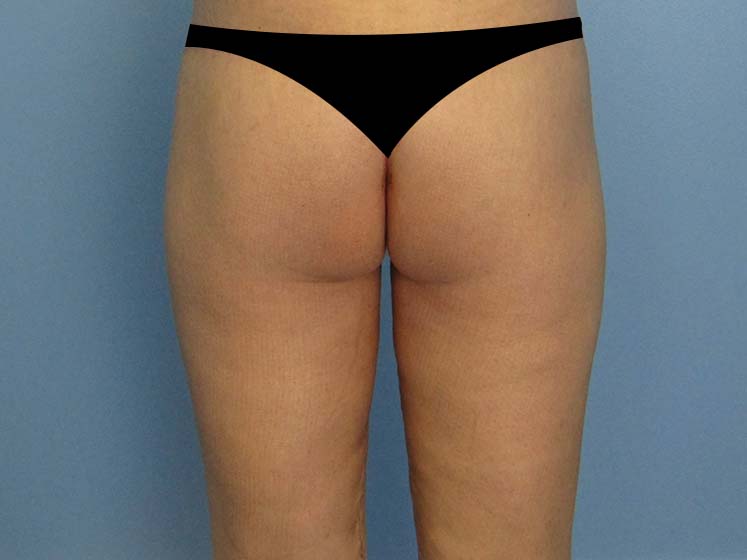
Patient 2
Before
After